
Guide for fitting Decals
Preparation prior to applying decals
It is very important to invest
a small amount of time preparing the surface to which you intend fitting your
new decal / decals.
Dirt, grease, hairs, flies & so on will all affect the looks and life of
your application. Also bear in mind that any deep scratches or ridges may show
through & should be eliminated wherever possible.
Clean the area or indeed the whole part to which you are applying the decal
with a wax free cleaner (recommend Fairy liquid & water)
Climate
Ambient temperature can be very important in both helping
adhesion & with larger decals, allowing the vinyl to be shaped. Aim to work
at room temperature wherever possible & a hair dryer can be a handy tool
for shaping Vinyl into tight corners.
Think the job through
Take some time to prepare yourself
& your surroundings to help make the job easier, clean hands are a good
start & you will find that long hair, woolly jumpers & pets have a strange
magnetism to your decal.
Make sure that any work surfaces are tidy & clean, unfortunately the best
place in many homes to fit larger decals is on the kitchen worktop, a cause
of many arguments I am sure!
Take some time to work out exactly where you are going to apply the decal, remember
that some sets have both left & right handed variants. You may want to pin
the decal in place with masking tape & step back to check the perspective.
It helps to use a measure to get an equal & balanced finish on many decals;
using a lead pencil to lightly mark out application areas helps. It is worth
checking against original if fitted, as you may want to make adjustment to cover
the trace left by an previous installation
Application
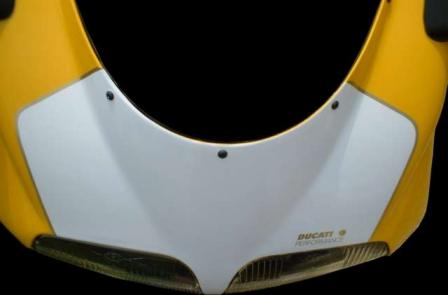
Large decals such as fairing number boards & Fender
stripes are near impossible to fit correctly if dry! Yes it sounds strange but
all of our Vinyl decals have a specialist adhesive, which allows wet application.
This allows you to completely remove & re-apply a misplaced decal &
helps you remove any air or water droplets that are trapped once the decal is
applied. a soft blunt plastic tool like a credit card is ok or if you are feeling
wealthy you can buy a squeegee for a small price.
A mist of water pre mixed with a tiny amount of Fairy liquid (2-3 drops to half
a pint of water) sprayed on the application area from a garden trigger sprayer
is ideal. If you are not able to do this, the next best option is to dampen
the application area using the same mix, smeared with your hand.
Apply the Decal
Note* some decals like number boards & fender stripes
require stretching of the vinyl. This is perfectly normal & achievable with
a little force / heat; you would need to be pretty strong to tear such items.
Basically once you have your decal in the correct position, work from the centre
out to push out the water / fairy solution from under the surface, the adhesive
will begin to bond with the application area.
it may take several minutes of working, especially with shaped decals. You are
also activating the adhesive by applying pressure & should begin to see
any stubborn area's start bonding as water is removed.
We won't sell a decal that we
have not successfully fitted ourselves.
If you are still unsure or feel that you need extra advise
with any fitting, then please contact us at service@carbon-trader.com
Finally, try if possible to leave the finished item overnight in a warm area
to finish bonding, & above all enjoy your finished product!!